Учебное пособие по Python Chat с Django и React
В этом уроке рассказывается о том, как построить чат-приложение с помощью Python, Django и React.
В отличие от других руководств, я не использую Python/Django для WebSocket-соединений. Хотя с технической точки зрения это может показаться круто, это довольно медлительно и дорого - особенно если у вас есть хоть сколько-нибудь приличное количество пользователей. Такие языки, как C++, Go и Elixir, гораздо лучше справляются с основной задачей чата.
В этом руководстве мы будем использовать Stream, API для чата, который позаботится о WebSocket-соединениях и другой тяжелой работе, используя Go, Raft и RocksDB.
Оглавление:
- React Chat Demo UI
- Настройка Django/Python
- User Auth
- Django Rest Framework
- Генерирование токенов для доступа к чат-серверу Stream
- Интеграция Auth в React
- Отправка сообщения с Python-сервера
- Заключительные мысли
Репо GitHub для приведенного ниже кода можно найти по адресу https://github.com/GetStream/python-chat-example.
Шаг 1 - React Chat Demo UI
Прежде чем мы начнем думать о чате на Python, давайте создадим простой фронтенд на React, чтобы у нас было на что посмотреть:
$ yarn global add create-react-app
$ brew install node && brew install yarn # skip if installed
$ create-react-app chat-frontend
$ cd chat-frontend
$ yarn add stream-chat-react
Замените код в src/App.js на:
import React from "react";
import {
  Chat,
  Channel,
  ChannelHeader,
  Thread,
  Window
} from "stream-chat-react";
import { MessageList, MessageInput } from "stream-chat-react";
import { StreamChat } from "stream-chat";

import "stream-chat-react/dist/css/index.css";

const chatClient = new StreamChat("qk4nn7rpcn75"); // Demo Stream Key
const userToken =
  "eyJ0eXAiOiJKV1QiLCJhbGciOiJIUzI1NiJ9.eyJ1c2VyX2lkIjoiY29vbC1za3ktOSJ9.mhikC6HPqPKoCP4aHHfuH9dFgPQ2Fth5QoRAfolJjC4"; // Demo Stream Token

chatClient.setUser(
  {
    id: "cool-sky-9",
    name: "Cool sky",
    image: "https://getstream.io/random_svg/?id=cool-sky-9&name=Cool+sky"
  },
  userToken
);

const channel = chatClient.channel("messaging", "godevs", {
  // image and name are required, however, you can add custom fields
  image:
    "https://cdn.chrisshort.net/testing-certificate-chains-in-go/GOPHER_MIC_DROP.png",
  name: "Talk about Go"
});

const App = () => (
  <Chat client={chatClient} theme={"messaging light"}>
    <Channel channel={channel}>
      <Window>
        <ChannelHeader />
        <MessageList />
        <MessageInput />
      </Window>
      <Thread />
    </Channel>
  </Chat>
);

export default App;
Далее выполните yarn start, чтобы увидеть чат в действии!
Шаг 2 - Настройка Django/Python (пропустить, если он у вас уже есть)
Убедитесь, что у вас установлен и работает Python 3.7.
$ brew install python3

$ pip install virtualenv virtualenvwrapper
$ export WORKON_HOME=~/Envs
$ source /usr/local/bin/virtualenvwrapper.sh
$ mkvirtualenv chatexample -p `which python3`
$ workon chatexample
Если это не помогло, попробуйте воспользоваться следующим фрагментом:
$ python3 -m venv chatexample
$ source chatexample/bin/activate
Теперь, когда вы находитесь в виртуальной среде env, вы должны увидеть python 3 при запуске:
$ python --version
Чтобы начать новый проект Django, используйте следующий фрагмент:
$ pip install django
$ django-admin startproject mychat
А для запуска приложения:
$ cd mychat
$ python manage.py runserver
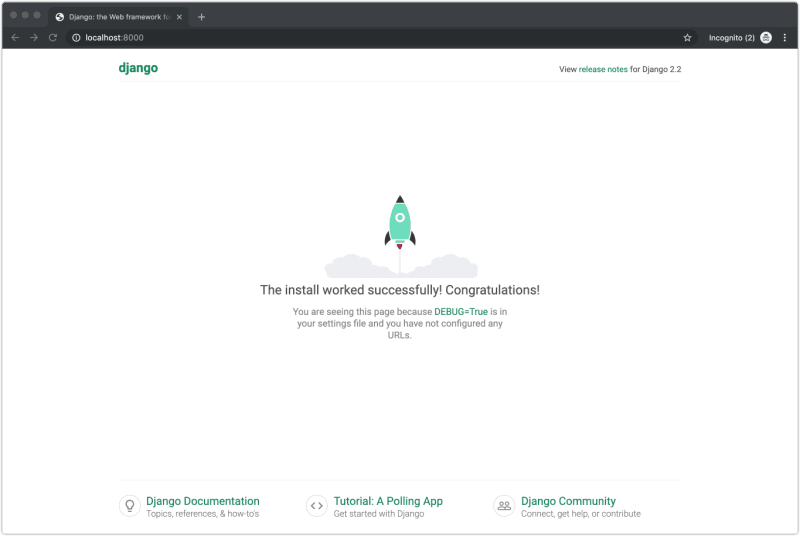
Теперь, открыв http://localhost:8000, вы должны увидеть следующее:
Шаг 3 - авторизация пользователя
В качестве следующего шага давайте настроим пользовательский аутентификатор Django.
$ python manage.py migrate
$ python manage.py createsuperuser
$ python manage.py runserver
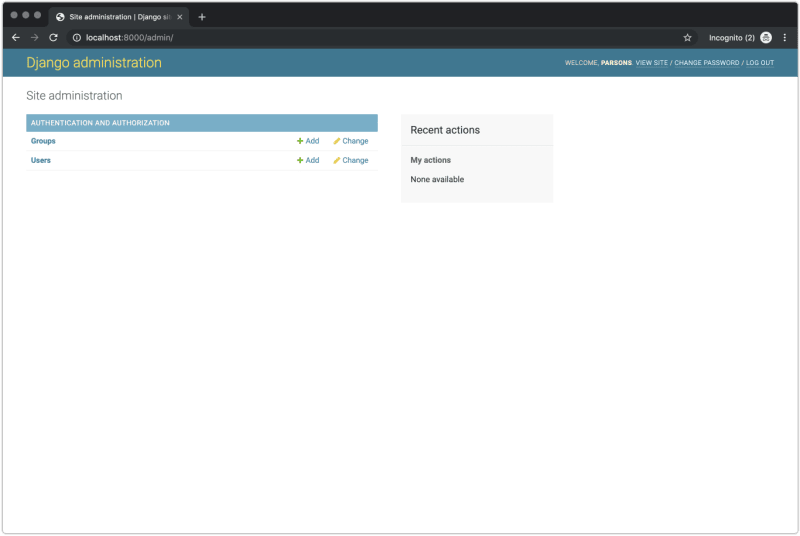
Посетите http://localhost:8000/admin/ и войдите в систему. Вуаля!
Вы должны увидеть экран администратора Django, как показано ниже:
Шаг 4 - Django Rest Framework
Одним из моих любимых пакетов для интеграции react с Django является Django Rest Framework. Для того чтобы все работало, нам потребуется создать конечные точки для:
- User Signup
- Вход пользователя
Мы могли бы создать их сами, однако существует пакет Djoser, который уже решил эту проблему. В нем сконфигурированы необходимые конечные точки API для регистрации пользователей, входа в систему, сброса пароля и т.д.
Для установки Djoser используйте следующий фрагмент:
$ pip install djangorestframework djoser
Затем отредактируйте urls.py и измените файл так, чтобы он содержал:
from django.contrib import admin
from django.urls import path, include

urlpatterns = [
    path('admin/', admin.site.urls),
    path('auth/', include('djoser.urls')),
    path('auth/', include('djoser.urls.authtoken')),
]
После этого отредактируйте settings.py и внесите следующие изменения:
INSTALLED_APPS = [
    'django.contrib.admin',
    'django.contrib.auth',
    'django.contrib.contenttypes',
    'django.contrib.sessions',
    'django.contrib.messages',
    'django.contrib.staticfiles',
    'rest_framework',
    'rest_framework.authtoken',
    'djoser',
]

REST_FRAMEWORK = {
    'DEFAULT_AUTHENTICATION_CLASSES': (
        'rest_framework.authentication.TokenAuthentication',
    )
}
Подробнее о конечных точках API, которые открывает Djoser, можно прочитать здесь:
https://djoser.readthedocs.io/en/latest/sample_usage.html
Теперь перейдем к тестированию конечной точки регистрации:
$ curl -X POST http://127.0.0.1:8000/auth/users/ --data 'username=djoser&password=alpine12'
Шаг 5 - Генерация токенов для доступа к чат-серверу Stream
Теперь нам необходимо настроить представления Djoser для генерации токенов для Stream. Давайте начнем.
Давайте немного упорядочим наши файлы и создадим папку chat app в нашем проекте (убедитесь, что вы находитесь в правильном каталоге):
$ python manage.py startapp auth
Установить stream-chat:
$ pip install stream-chat
Создайте в auth/serializers.py пользовательский сериализатор со следующей логикой:
from djoser.serializers import TokenSerializer
from rest_framework import serializers
from djoser.conf import settings as djoser_settings
from stream_chat import StreamChat
from django.conf import settings

class StreamTokenSerializer(TokenSerializer):
    stream_token = serializers.SerializerMethodField()

    class Meta:
        model = djoser_settings.TOKEN_MODEL
        fields = ('auth_token','stream_token')

    def get_stream_token(self, obj):
        client = StreamChat(api_key=settings.STREAM_API_KEY, api_secret=settings.STREAM_API_SECRET)
        token = client.create_token(obj.user.id)

        return token
И, наконец, используйте пользовательский сериализатор, обновив свой settings.py файл:
STREAM_API_KEY = YOUR_STREAM_API_KEY # https://getstream.io/dashboard/
STREAM_API_SECRET = YOUR_STREAM_API_SECRET
DJOSER = {
    'SERIALIZERS': {
        'token': 'auth.serializers.StreamTokenSerializer',
    }
}
Перезапуск миграции:
$ python manage.py migrate
Чтобы убедиться в его работоспособности, обратитесь к конечной точке входа в систему с POST-запросом:
$ curl -X POST http://127.0.0.1:8000/auth/token/login/ --data 'username=djoser&password=alpine12'
Должны быть возвращены и auth_token, и stream_token.
Шаг 6 - Интеграция Auth в React
Добавление auth позже во фронтенд является необходимым шагом по очевидным причинам. В нашем случае это особенно полезно, поскольку мы можем получить токен пользователя из API бэкенда (на основе Python) и динамически использовать его при отправке сообщений.
Сначала установите пакет промежуточного ПО CORS для Django:
$ pip install django-cors-headers
Затем измените свой settings.py так, чтобы он ссылался на промежуточное ПО djors-cors-header:
INSTALLED_APPS = (
    ...
    'corsheaders',
    ...
)

MIDDLEWARE = [
    ...
    'corsheaders.middleware.CorsMiddleware',
    'django.middleware.common.CommonMiddleware',
    ...
]
И, наконец, добавьте в файл settings.py следующее:
CORS_ORIGIN_ALLOW_ALL = True
На следующем этапе необходимо внести несколько изменений во фронтенд. Для начала необходимо убедиться, что все зависимости установлены с помощью yarn:
$ yarn add axios react-dom react-router-dom
Далее создайте в каталоге src/ следующие файлы:
- AuthedRoute.js
- UnauthedRoute.js
- withSession.js
- Login.js
- Chat.js
App.js
import React from "react";
import { BrowserRouter as Router, Switch } from "react-router-dom";

import Chat from "./Chat";
import Login from "./Login";

import UnauthedRoute from "./UnauthedRoute";
import AuthedRoute from "./AuthedRoute";

const App = () => (
  <Router>
    <Switch>
      <UnauthedRoute path="/auth/login" component={Login} />
      <AuthedRoute path="/" component={Chat} />
    </Switch>
  </Router>
);

export default App;
AuthedRoute.js
import React from "react";
import { Redirect, Route } from "react-router-dom";

const AuthedRoute = ({ component: Component, loading, ...rest }) => {
  const isAuthed = Boolean(localStorage.getItem("token"));
  return (
    <Route
      {...rest}
      render={props =>
        loading ? (
          <p>Loading...</p>
        ) : isAuthed ? (
          <Component history={props.history} {...rest} />
        ) : (
          <Redirect
            to={{
              pathname: "/auth/login",
              state: { next: props.location }
            }}
          />
        )
      }
    />
  );
};

export default AuthedRoute;
UnauthedRoute.js
import React from "react";
import { Redirect, Route } from "react-router-dom";

const AuthedRoute = ({ component: Component, loading, ...rest }) => {
  const isAuthed = Boolean(localStorage.getItem("token"));
  return (
    <Route
      {...rest}
      render={props =>
        loading ? (
          <p>Loading...</p>
        ) : !isAuthed ? (
          <Component history={props.history} {...rest} />
        ) : (
          <Redirect
            to={{
              pathname: "/"
            }}
          />
        )
      }
    />
  );
};

export default AuthedRoute;
withSession.js
import React from "react";
import { withRouter } from "react-router";

export default (Component, unAuthed = false) => {
  const WithSession = ({ user = {}, streamToken, ...props }) =>
    user.id || unAuthed ? (
      <Component
        userId={user.id}
        user={user}
        session={window.streamSession}
        {...props}
      />
    ) : (
      <Component {...props} />
    );

  return withRouter(WithSession);
};
Login.js
import React, { Component } from "react";
import axios from "axios";

class Login extends Component {
  constructor(props) {
    super(props);

    this.state = {
      loading: false,
      email: "",
      password: ""
    };

    this.initStream = this.initStream.bind(this);
  }

  async initStream() {
    await this.setState({
      loading: true
    });

    const base = "http://localhost:8000";

    const formData = new FormData();
    formData.set("username", this.state.email);
    formData.set("password", this.state.password);

    const registration = await axios({
      method: "POST",
      url: `${base}/auth/users/`,
      data: formData,
      config: {
        headers: { "Content-Type": "multipart/form-data" }
      }
    });

    const authorization = await axios({
      method: "POST",
      url: `${base}/auth/token/login/`,
      data: formData,
      config: {
        headers: { "Content-Type": "multipart/form-data" }
      }
    });

    localStorage.setItem("token", authorization.data.stream_token);

    await this.setState({
      loading: false
    });

    this.props.history.push("/");
  }

  handleChange = e => {
    this.setState({
      [e.target.name]: e.target.value
    });
  };

  render() {
    return (
      <div className="login-root">
        <div className="login-card">
          <h4>Login</h4>
          <input
            type="text"
            placeholder="Email"
            name="email"
            onChange={e => this.handleChange(e)}
          />
          <input
            type="password"
            placeholder="Password"
            name="password"
            onChange={e => this.handleChange(e)}
          />
          <button onClick={this.initStream}>Submit</button>
        </div>
      </div>
    );
  }
}

export default Login;
Chat.js
import React, { Component } from "react";
import {
  Chat,
  Channel,
  ChannelHeader,
  Thread,
  Window
} from "stream-chat-react";
import { MessageList, MessageInput } from "stream-chat-react";
import { StreamChat } from "stream-chat";

import "stream-chat-react/dist/css/index.css";

class App extends Component {
  constructor(props) {
    super(props);
    this.client = new StreamChat("<YOUR_STREAM_APP_ID>");

    this.client.setUser(
      {
        id: "cool-sky-9",
        name: "Cool Sky",
        image: "https://getstream.io/random_svg/?id=cool-sky-9&name=Cool+sky"
      },
      localStorage.getItem("token")
    );

    this.channel = this.client.channel("messaging", "godevs", {
      image:
        "https://cdn.chrisshort.net/testing-certificate-chains-in-go/GOPHER_MIC_DROP.png",
      name: "Talk about Go"
    });
  }

  render() {
    return (
      <Chat client={this.client} theme={"messaging light"}>
        <Channel channel={this.channel}>
          <Window>
            <ChannelHeader />
            <MessageList />
            <MessageInput />
          </Window>
          <Thread />
        </Channel>
      </Chat>
    );
  }
}

export default App;
Обязательно замените YOUR_STREAM_APP_ID на действительный идентификатор Stream App ID, который можно найти на dashboard.
Перезапустите ваше фронтенд-приложение, и вы должны столкнуться с auth wall! Введите свой e-mail и пароль, после чего будет запрошен токен, который будет сохранен в локальном хранилище.
Шаг 7 - Отправка сообщения с чат-сервера Python
Иногда возникает необходимость писать в API чата, используя свой внутренний сервер на базе Python. Вот быстрая команда управления, которую вы можете использовать:
Убедитесь, что установленные приложения выглядят следующим образом в settings.py:
INSTALLED_APPS = [
    'corsheaders',
    'django.contrib.admin',
    'django.contrib.auth',
    'django.contrib.contenttypes',
    'django.contrib.sessions',
    'django.contrib.messages',
    'django.contrib.staticfiles',
    'rest_framework',
    'rest_framework.authtoken',
    'djoser',
]
Далее создайте каталог chat/management/commands. В этот каталог добавьте файл с именем broadcast.py с таким содержанием:
from django.core.management.base import BaseCommand, CommandError
from django.conf import settings
from stream_chat import StreamChat

class Command(BaseCommand):
    help = 'Broadcast the message on your channel'

    def add_arguments(self, parser):
        parser.add_argument('--message')

    def handle(self, *args, **options):
        client = StreamChat(api_key=settings.STREAM_API_KEY, api_secret=settings.STREAM_API_SECRET)
        client.update_user({"id": "system", "name": "The Server"})
        channel = client.channel("messaging", "kung-fu")
        channel.create("system")
        response = channel.send_message({"text": "AMA about kung-fu"}, 'system')
        self.stdout.write(self.style.SUCCESS('Successfully posted a message with id "%s"' % response['message']['id']))
Вы можете попробовать отправить сообщение в чат следующим образом:
$ python manage.py broadcast --message hello
И вы должны увидеть ответ следующего содержания:

Заключительные мысли
Надеюсь, вам понравилось это руководство по созданию чат-приложения с помощью Django, Python и React!
Для получения интерактивного представления о Stream Chat ознакомьтесь с нашим API Tutorial на сайте Stream. Если вам интересно покопаться в коде React-компонентов Stream Chat, полную документацию можно найти здесь. Если вы заинтересованы в создании чата на основе Stream, мы предлагаем различные SDK для популярных языков и фреймворков, в том числе для iOS (Swift).
Счастливого кодирования! ✌
Вернуться на верх