Django Channels и WebSocket`ы
В течение более чем десяти лет после выхода Django в 2005 году страницы были в основном статичными, AJAX использовался только в ограниченных случаях, и все было относительно просто. За последние пять лет веб-приложения, работающие в реальном времени, эволюционировали в сторону более клиент-серверного и однорангового взаимодействия. Такой тип взаимодействия возможен благодаря WebSockets, новому протоколу, который обеспечивает полнодуплексную связь и поддерживает постоянное, открытое соединение между клиентом и сервером.
Django Channels облегчает поддержку WebSockets в Django подобно традиционным HTTP представлениям. В нем реализована встроенная поддержка асинхронных представлений, что позволяет проектам Django работать не только с HTTP, но и с протоколами, требующими длительных соединений, такими как WebSockets, MQTT, чатботы и т.д.
В этом руководстве мы покажем вам, как создать приложение реального времени с помощью Django Channels. Для демонстрации на живом примере мы создадим игру "Крестики-нолики" для двух игроков, как показано ниже. Вы можете получить полный исходный код в моем репозитории GitHub.

Настройка проекта Django
Следуйте инструкциям ниже, чтобы настроить проект Django.
Сначала установите Django и каналы. Вы также должны установить channels_redis, чтобы Channels знали, как взаимодействовать с Redis.
Выполните следующую команду:
pip install django==3.1
pip install channels==3.0
pip install channels_redis==3.2
Вы должны использовать pip3 для Linux/mac вместо pip и python3 вместо python. Я использовал django==3.1 и channels==3.0, channels_redis==3.2.0 для этого руководства.
Запустите проект Django:
django-admin startproject tic_tac_toe
Далее создайте приложение с именем game:
python manage.py startapp game
Добавьте channels и game в INSTALLED_APPS внутри вашего settings.py:
## settings.py
INSTALLED_APPS = [
    'django.contrib.admin',
    'django.contrib.auth',
    'django.contrib.contenttypes',
    'django.contrib.sessions',
    'django.contrib.messages',
    'django.contrib.staticfiles',
    'channels',
    'game'
]
Запустите migrate для применения непримененных миграций:
python manage.py migrate
Также добавьте STATICFILES_DIRS внутри вашего settings.py:
## settings.py
import os
STATICFILES_DIRS = [
    os.path.join(BASE_DIR, "static"),
]
Теперь пришло время создать необходимые файлы для нашего проекта Django. На протяжении всего руководства вы можете ссылаться на следующую структуру каталогов:
├── db.sqlite3
├── game
│   ├── consumers.py
│   ├── routing.py
│   ├── templates
│   │   ├── base.html
│   │   ├── game.html
│   │   └── index.html
│   └── views.py
├── manage.py
├── requirements.txt
├── static
│   ├── css
│   │   └── main.css
│   └── js
│       └── game.js
└── tic_tac_toe
    ├── __init__.py
    ├── asgi.py
    ├── settings.py
    ├── urls.py
    └── wsgi.py
Встройте библиотеку Django Channels
Теперь давайте интегрируем Channels в проект Django.
Django >2 не имеет встроенной поддержки ASGI, поэтому вам нужно использовать альтернативный вариант Channel.
Обновите asgi.py как показано ниже:
## tic_tac_toe/asgi.py
import os

import django
from channels.http import AsgiHandler
from channels.routing import ProtocolTypeRouter

os.environ.setdefault('DJANGO_SETTINGS_MODULE', 'tic_tac_toe.settings')
django.setup()

application = ProtocolTypeRouter({
  "http": AsgiHandler(),
  ## IMPORTANT::Just HTTP for now. (We can add other protocols later.)
})
Обновите settings.py и измените приложение Django с WSGI на ASGI, внеся следующие изменения. Это направит каналы на корневую конфигурацию маршрутизации.
## settings.py
# WSGI_APPLICATION = 'tic_tac_toe.wsgi.application'
# Channels
ASGI_APPLICATION = "tic_tac_toe.asgi.application"
Далее, включите канальный уровень, который позволяет нескольким экземплярам потребителей общаться друг с другом.
Обратите внимание, что вы можете использовать Redis в качестве резервного хранилища. Чтобы включить Redis, вы можете использовать метод 1, если вам нужен Redis Cloud, или метод 2 для локального Redis. В этом руководстве я использовал метод 3 - In-memory channel layer - который подходит для тестирования и локальной разработки.
Чтобы включить слой канала, добавьте следующее CHANNEL_LAYERS в settings.py:
## settings.py
CHANNEL_LAYERS = {
    'default': {
        ### Method 1: Via redis lab
        # 'BACKEND': 'channels_redis.core.RedisChannelLayer',
        # 'CONFIG': {
        #     "hosts": [
        #       'redis://h:<password>;@<redis Endpoint>:<port>'
        #     ],
        # },

        ### Method 2: Via local Redis
        # 'BACKEND': 'channels_redis.core.RedisChannelLayer',
        # 'CONFIG': {
        #      "hosts": [('127.0.0.1', 6379)],
        # },

        ### Method 3: Via In-memory channel layer
        ## Using this method.
        "BACKEND": "channels.layers.InMemoryChannelLayer"
    },
}
Убедитесь, что сервер разработки каналов работает правильно. Выполните следующую команду:
python manage.py runserver
Разработка индексной страницы
Начнем с создания индексной страницы, где пользователю предлагается ввести код комнаты и выбрать символ (X или O).
Создайте представление на основе функций в game/views.py:
# game/views.py
from django.shortcuts import render, redirect

def index(request):
    if request.method == "POST":
        room_code = request.POST.get("room_code")
        char_choice = request.POST.get("character_choice")
        return redirect(
            '/play/%s?&choice=%s'
            %(room_code, char_choice)
        )
    return render(request, "index.html", {})
Далее, создайте маршрут для представления index в tic_tac_toe/urls.py:
## urls.py
from django.urls import path
from game.views import index

urlpatterns = [
    ## ... Other URLS
    path('', index),
]
Теперь создайте базовый шаблон в game/templates/base.html (игнорируйте, если вы уже создали его). Этот шаблон будет наследоваться другими представлениями шаблона.
{% comment %} base.html {% endcomment %}
{% load static %}
<!DOCTYPE html>
<html lang="en">
<head>
    <meta charset="UTF-8">
    <meta name="viewport" content="width=device-width, initial-scale=1.0">
    <title>Tic Tac Toe</title>
     <link rel='stylesheet' href='{% static "/css/main.css" %}'>
</head>
<body>
{% block content %}
{% endblock content %}
<script src = "{% static 'js/game.js' %}"></script>
{% block javascript %}
{% endblock javascript %}
</body>
</html>
Создайте шаблон представления для индексного представления в game/templates/index.html:
{% comment %} index.html {% endcomment %}

{% extends 'base.html' %}
{% block content %}
<div class="wrapper">
  <h1>Welcome to Tic Tac Toe Game</h1>
  <form method="POST">
    {% csrf_token %}
    <div class='form-control'>
      <label for="room">Room id</label>
      <input id="room" type="text" name="room_code" required />
    </div>
    <div class='form-control'>
      <label for="character_choice">Your character</label>
      <select for="character_choice" name = "character_choice">
      <option value="X">X</option>
      <option value="O">O</option>
      </select>
    </div>
    <input type="submit" class="button" value="Start Game" />
</div>
</form>
{% endblock content %}
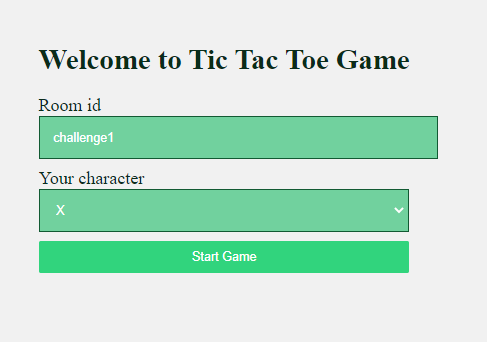
Запустите сервер разработки Django и перейдите по адресу http://127.0.0.1:8000, чтобы проверить, работает ли индексная страница:
Разработка страницы игры
Теперь, когда индексная страница готова, давайте построим игровую страницу.
Начните с создания game/views.py:
## game/views.py
from django.shortcuts import render, redirect
from django.http import Http404

def game(request, room_code):
    choice = request.GET.get("choice")
    if choice not in ['X', 'O']:
        raise Http404("Choice does not exists")
    context = {
        "char_choice": choice,
        "room_code": room_code
    }
    return render(request, "game.html", context)
Добавьте URL-маршрут вышеуказанного представления:
## urls.py
from django.urls import path
from game.views import game

urlpatterns = [
    ## other url routes
    path('play/<room_code>', game),
]
Теперь, когда бэкенд готов, давайте создадим фронтенд игрового поля. Ниже приведен шаблон Django:game/templates/game.html
{% extends 'base.html' %}
{% comment %} game.html {% endcomment %}
{% load static %}

{% block content %}
<div class="wrapper">
    <div class="head">
        <h1>TIC TAC TOE</h1>
        <h3>Welcome to room_{{room_code}}</h3>
    </div>
    <div id = "game_board" room_code = {{room_code}} char_choice = {{char_choice}}>
        <div class="square" data-index = '0'></div>
        <div class="square" data-index = '1'></div>
        <div class="square" data-index = '2'></div>
        <div class="square" data-index = '3'></div>
        <div class="square" data-index = '4'></div>
        <div class="square" data-index = '5'></div>
        <div class="square" data-index = '6'></div>
        <div class="square" data-index = '7'></div>
        <div class="square" data-index = '8'></div>
    </div>
    <div id = "alert_move">Your turn. Place your move <strong>{{char_choice}}</strong></div>
</div>
{% endblock content %}
Чтобы сетка и индексная страница выглядели хорошо, добавьте CSS, как показано ниже:
/* static/css/main.css */
body {
    /* width: 100%; */
    height: 90vh;
    background: #f1f1f1;
    display: flex;
    justify-content: center;
    align-items: center;
}
#game_board {
    display: grid;
    grid-gap: 0.5em;
    grid-template-columns: repeat(3, 1fr);
    width: 16em;
    height: auto;
    margin: 0.5em 0;
}
.square{
    background: #2f76c7;
    width: 5em;
    height: 5em;
    display: flex;
    justify-content: center;
    align-items: center;
    border-radius: 0.5em;
    font-weight: 500;
    color: white;
    box-shadow: 0.025em 0.125em 0.25em rgba(0, 0, 0, 0.25);
}
.head{
    width: 16em;
    text-align: center;
}
.wrapper h1, h3 {
    color: #0a2c1a;
}
label {
    font-size: 20px;
    color: #0a2c1a;
}
input, select{
    margin-bottom: 10px;
    width: 100%;
    padding: 15px;
    border: 1px solid #125a33;
    font-size: 14px;
    background-color: #71d19e;
    color: white;
}
.button{
    color: white;
    white-space: nowrap;
    background-color: #31d47d;
    padding: 10px 20px;
    border: 0;
    border-radius: 2px;
    transition: all 150ms ease-out;
}
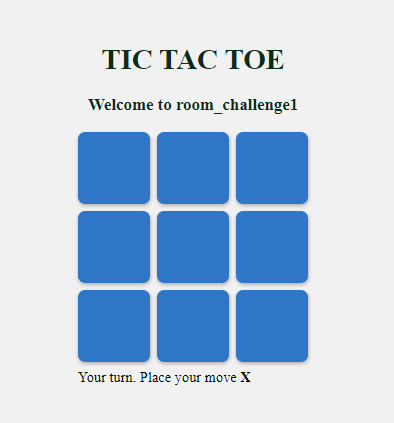
Когда вы запустите сервер разработки, вы увидите игровую панель, как показано ниже:
Добавление WebSockets в ваше приложение Django
Теперь, когда страницы созданы, давайте добавим к ним WebSockets.
Введите следующий код в game/consumers.py:
## game/consumers.py
import json
from channels.generic.websocket import AsyncJsonWebsocketConsumer

class TicTacToeConsumer(AsyncJsonWebsocketConsumer):
    async def connect(self):
        self.room_name = self.scope\['url_route'\]['kwargs']['room_code']
        self.room_group_name = 'room_%s' % self.room_name

        # Join room group
        await self.channel_layer.group_add(
            self.room_group_name,
            self.channel_name
        )
        await self.accept()

    async def disconnect(self, close_code):
        print("Disconnected")
        # Leave room group
        await self.channel_layer.group_discard(
            self.room_group_name,
            self.channel_name
        )

    async def receive(self, text_data):
        """
        Receive message from WebSocket.
        Get the event and send the appropriate event
        """
        response = json.loads(text_data)
        event = response.get("event", None)
        message = response.get("message", None)
        if event == 'MOVE':
            # Send message to room group
            await self.channel_layer.group_send(self.room_group_name, {
                'type': 'send_message',
                'message': message,
                "event": "MOVE"
            })

        if event == 'START':
            # Send message to room group
            await self.channel_layer.group_send(self.room_group_name, {
                'type': 'send_message',
                'message': message,
                'event': "START"
            })

        if event == 'END':
            # Send message to room group
            await self.channel_layer.group_send(self.room_group_name, {
                'type': 'send_message',
                'message': message,
                'event': "END"
            })

    async def send_message(self, res):
        """ Receive message from room group """
        # Send message to WebSocket
        await self.send(text_data=json.dumps({
            "payload": res,
        }))
Создайте конфигурацию маршрутизации для игрового приложения, в которой есть маршрут к потребителю. Создайте новый файл game/routing.py и вставьте в него следующий код:
## game/routing.py
from django.conf.urls import url
from game.consumers import TicTacToeConsumer

websocket_urlpatterns = [
    url(r'^ws/play/(?P<room_code>\w+)/$', TicTacToeConsumer.as_asgi()),
]
Следующий шаг - направить корневую конфигурацию маршрутизации на модуль game.routing. Обновите tic_tac_toe/asgi.py следующим образом:
## tic_tac_toe/asgi.py
import os

from django.core.asgi import get_asgi_application
from channels.auth import AuthMiddlewareStack
from channels.routing import ProtocolTypeRouter, URLRouter
import game.routing

os.environ.setdefault('DJANGO_SETTINGS_MODULE', 'tic_tac_toe.settings')

# application = get_asgi_application()
application = ProtocolTypeRouter({
    "http": get_asgi_application(),
    "websocket": AuthMiddlewareStack(
        URLRouter(
            game.routing.websocket_urlpatterns
        )
    ),
})
Давайте построим финальную часть кода, создав JavaScript - клиентскую часть, которая асинхронно общается с сервером. Поместите следующий код в static/js/game.js:
// static/js/game.js

var roomCode = document.getElementById("game_board").getAttribute("room_code");
var char_choice = document.getElementById("game_board").getAttribute("char_choice");

var connectionString = 'ws://' + window.location.host + '/ws/play/' + roomCode + '/';
var gameSocket = new WebSocket(connectionString);
// Game board for maintaing the state of the game
var gameBoard = [
    -1, -1, -1,
    -1, -1, -1,
    -1, -1, -1,
];
// Winning indexes.
winIndices = [
    [0, 1, 2],
    [3, 4, 5],
    [6, 7, 8],
    [0, 3, 6],
    [1, 4, 7],
    [2, 5, 8],
    [0, 4, 8],
    [2, 4, 6]
]
let moveCount = 0; //Number of moves done
let myturn = true; // Boolean variable to get the turn of the player.

// Add the click event listener on every block.
let elementArray = document.getElementsByClassName('square');
for (var i = 0; i < elementArray.length; i++){
    elementArray[i].addEventListener("click", event=>{
        const index = event.path[0].getAttribute('data-index');
        if(gameBoard[index] == -1){
            if(!myturn){
                alert("Wait for other to place the move")
            }
            else{
                myturn = false;
                document.getElementById("alert_move").style.display = 'none'; // Hide
                make_move(index, char_choice);
            }
        }
    })
}

// Make a move
function make_move(index, player){
    index = parseInt(index);
    let data = {
        "event": "MOVE",
        "message": {
            "index": index,
            "player": player
        }
    }

    if(gameBoard[index] == -1){
        // if the valid move, update the gameboard
        // state and send the move to the server.
        moveCount++;
        if(player == 'X')
            gameBoard[index] = 1;
        else if(player == 'O')
            gameBoard[index] = 0;
        else{
            alert("Invalid character choice");
            return false;
        }
        gameSocket.send(JSON.stringify(data))
    }
    // place the move in the game box.
    elementArray[index].innerHTML = player;
    // check for the winner
    const win = checkWinner();
    if(myturn){
        // if player winner, send the END event.
        if(win){
            data = {
                "event": "END",
                "message": `${player} is a winner. Play again?`
            }
            gameSocket.send(JSON.stringify(data))
        }
        else if(!win && moveCount == 9){
            data = {
                "event": "END",
                "message": "It's a draw. Play again?"
            }
            gameSocket.send(JSON.stringify(data))
        }
    }
}

// function to reset the game.
function reset(){
    gameBoard = [
        -1, -1, -1,
        -1, -1, -1,
        -1, -1, -1,
    ];
    moveCount = 0;
    myturn = true;
    document.getElementById("alert_move").style.display = 'inline';
    for (var i = 0; i < elementArray.length; i++){
        elementArray[i].innerHTML = "";
    }
}

// check if their is winning move
const check = (winIndex) => {
    if (
      gameBoard[winIndex[0]] !== -1 &&
      gameBoard[winIndex[0]] === gameBoard[winIndex[1]] &&
      gameBoard[winIndex[0]] === gameBoard[winIndex[2]]
    )   return true;
    return false;
};

// function to check if player is winner.
function checkWinner(){
    let win = false;
    if (moveCount >= 5) {
      winIndices.forEach((w) => {
        if (check(w)) {
          win = true;
          windex = w;
        }
      });
    }
    return win;
}

// Main function which handles the connection
// of websocket.
function connect() {
    gameSocket.onopen = function open() {
        console.log('WebSockets connection created.');
        // on websocket open, send the START event.
        gameSocket.send(JSON.stringify({
            "event": "START",
            "message": ""
        }));
    };

    gameSocket.onclose = function (e) {
        console.log('Socket is closed. Reconnect will be attempted in 1 second.', e.reason);
        setTimeout(function () {
            connect();
        }, 1000);
    };
    // Sending the info about the room
    gameSocket.onmessage = function (e) {
        // On getting the message from the server
        // Do the appropriate steps on each event.
        let data = JSON.parse(e.data);
        data = data["payload"];
        let message = data['message'];
        let event = data["event"];
        switch (event) {
            case "START":
                reset();
                break;
            case "END":
                alert(message);
                reset();
                break;
            case "MOVE":
                if(message["player"] != char_choice){
                    make_move(message["index"], message["player"])
                    myturn = true;
                    document.getElementById("alert_move").style.display = 'inline';
                }
                break;
            default:
                console.log("No event")
        }
    };

    if (gameSocket.readyState == WebSocket.OPEN) {
        gameSocket.onopen();
    }
}

//call the connect function at the start.
connect();
Теперь мы наконец закончили кодирование и готовы играть в нашу игру "Крестики-нолики"!
Заключение
В этом учебнике мы рассмотрели много тем: Django Channels, WebSockets, и немного фронтенда. Пока что наша игра имеет лишь минимальную, базовую функциональность. Вы можете использовать свои новые базовые знания, чтобы поиграть и добавить больше функциональности. Некоторые дополнительные упражнения, которые вы можете выполнить, включают:
- Добавление аутентификации пользователей
- Показ онлайн пользователей
- Добавление игровых данных в базу данных
- Сделать приложение масштабируемым, добавив Redis вместо слоя каналов in-memory
- Добавление искусственного интеллекта